Google Analytics
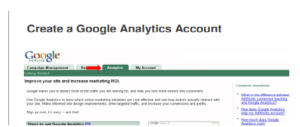
Google Analytics Digital Marketing To begin creating your Analytics account, first log in to your AdWords account and click on the Analytics tab.
Then click on the Continue button to enter your website information.
Choose your site from the drop down menu in the middle of the page.
Choose the site you wish to track.
Choose your site from the drop down menu in the middle of the page.
Choose the site you wish to track.
Click the box underneath to enable the connection between your AdWords
campaign and Analytics.
Click Link Account to begin setting up your profile for reporting.
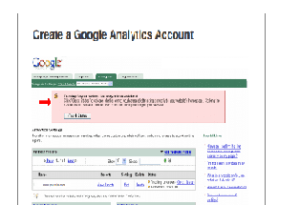
Once you’ve added the Analytics code to your website, the pink box at the top with the tracking warning will disappear.
Configure Your Profile
It’s important to configure your profile in order to get the most out of your
reports, so please don’t skip this step in the process.
When you get to this page, click on the Edit button next to the site you want to
configure.
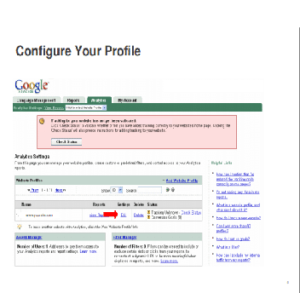
Under the Profile Settings header, click Edit again and fill in your information.
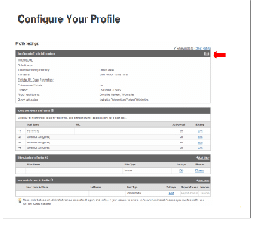
• Enter your Profile Name
• Enter your Website URL
• In the Default page field, enter your homepage URL.
• Setting this to your homepage, or index, of your site allows Google
Analytics to reconcile log entries for www.yoursite.com and
www.yoursite.com/index, for example. These are in fact the same page,
but are reported as two distinct pages until the Default page setting has
been configured.
If you have a shopping cart on your site, or offer shopping to your visitors, you’ll
want to enable e-commerce for Analytics. To enable e-commerce reporting and
the E-Commerce Analysis report set, select Yes. There will be more details
about e-commerce later on in the guide.
At this point, click Save Changes to continue configuring your profile.
Grant Access to Other Users
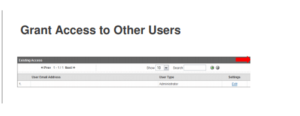
To grant access to another user:
• Make sure that they already have a free Google Account
• Then go to the Analytics tab within your AdWords account and click on the
Access Manager
• From the Access Manager, click Add User.
On the next screen you can enter the user’s email address, last name, and first
name. Google Analytics Digital Marketing
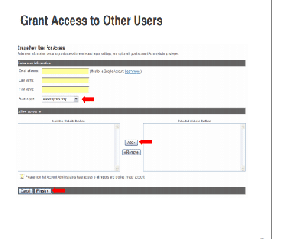
• From the drop down menu, select the Access type for the new user
• Choose an Access type from the drop down menu
• You have the choice of allowing them to View reports only, or access as
an Account Administrator, where they’ll be able to edit account settings
as well as view reports. If you select View reports only, select the
profiles (or websites) to which this user should have access (note that
Account Admins have access to all profiles). If you’ve only created one
profile (or site) , you will still want to select the profile.
• Click Add to move these profiles into the Selected Website Profiles list
• Click Finish to create the new user
Add Tracking Code to Your Website
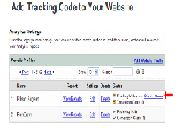
To get the tracking code from Analytics:
• Click the Check Status link to the right of the profile to get the tracking code
• Any site that hasn’t been configured yet will say Tracking Unknown until
you add the code to your website.
A portion of code will appear that you’ll need to add to your website. This is the portion of the
process that you may want to work with your webmaster to implement. These instructions are
available in the Analytics help center for future reference.
To add the code to your website:
• Copy and paste the code segment into the bottom of your HTML content, immediately
before the </body> tag of each page, you are planning to track
• If you use a common include or template, you can enter it there.
Google Analytics Digital Marketing
• If you need to track multiple domains (like a homepage and a secure store site)
• If you need to track more than one subdirectory (or sites that are within your site linked to the
homepage)
The Analytics Help Center tells you how to set up your site for these situations.
Create Goals & Funnels
- At this point, you’ve set up your account and installed the tracking code on every
page of your web site so that Analytics can start gathering data on your site. After
just 24 hours, you’ll be able to login to your Analytics account in AdWords and see
results about your visitors!
- But, that’s not enough. You want to be able to see all the nitty gritty details on what
these visitors are doing on your site: where they come from on the web, where they
go when they leave your site, whether they buy something from your site, make a
donation, or sign up for a newsletter or an alert. There are more than 80 reports you
can pull about the performance of your site, right down to the city the visitors are in
when they come to your site.
- But first, we have to find out what your specific goals are. In this section, we’ll go
over how to define the goals for your site, pick the ones most beneficial to you,
actually set up a goal and then go into some advanced goal configuration that you
can use if/when it’s right for your site.
Benefits of Goals
• Easily see how many visitors reach a page
• Understand where visitors may be falling off the path along the way
• Use this information to improve site content and design
• Goals help you make smarter decisions about your marketing efforts by telling you:
• Which marketing campaign or referral converted the most visitors.
• Geographic location of converted visitors.
• Keywords that lead to goal conversion.